Flutter Augmented Reality: Choosing the Right Plugin and Building Your First AR Experience
Build AR in Flutter with ARCore/ARKit. Compare plugins, set up iOS/Android, and ship a performant AR scene with code you can paste.
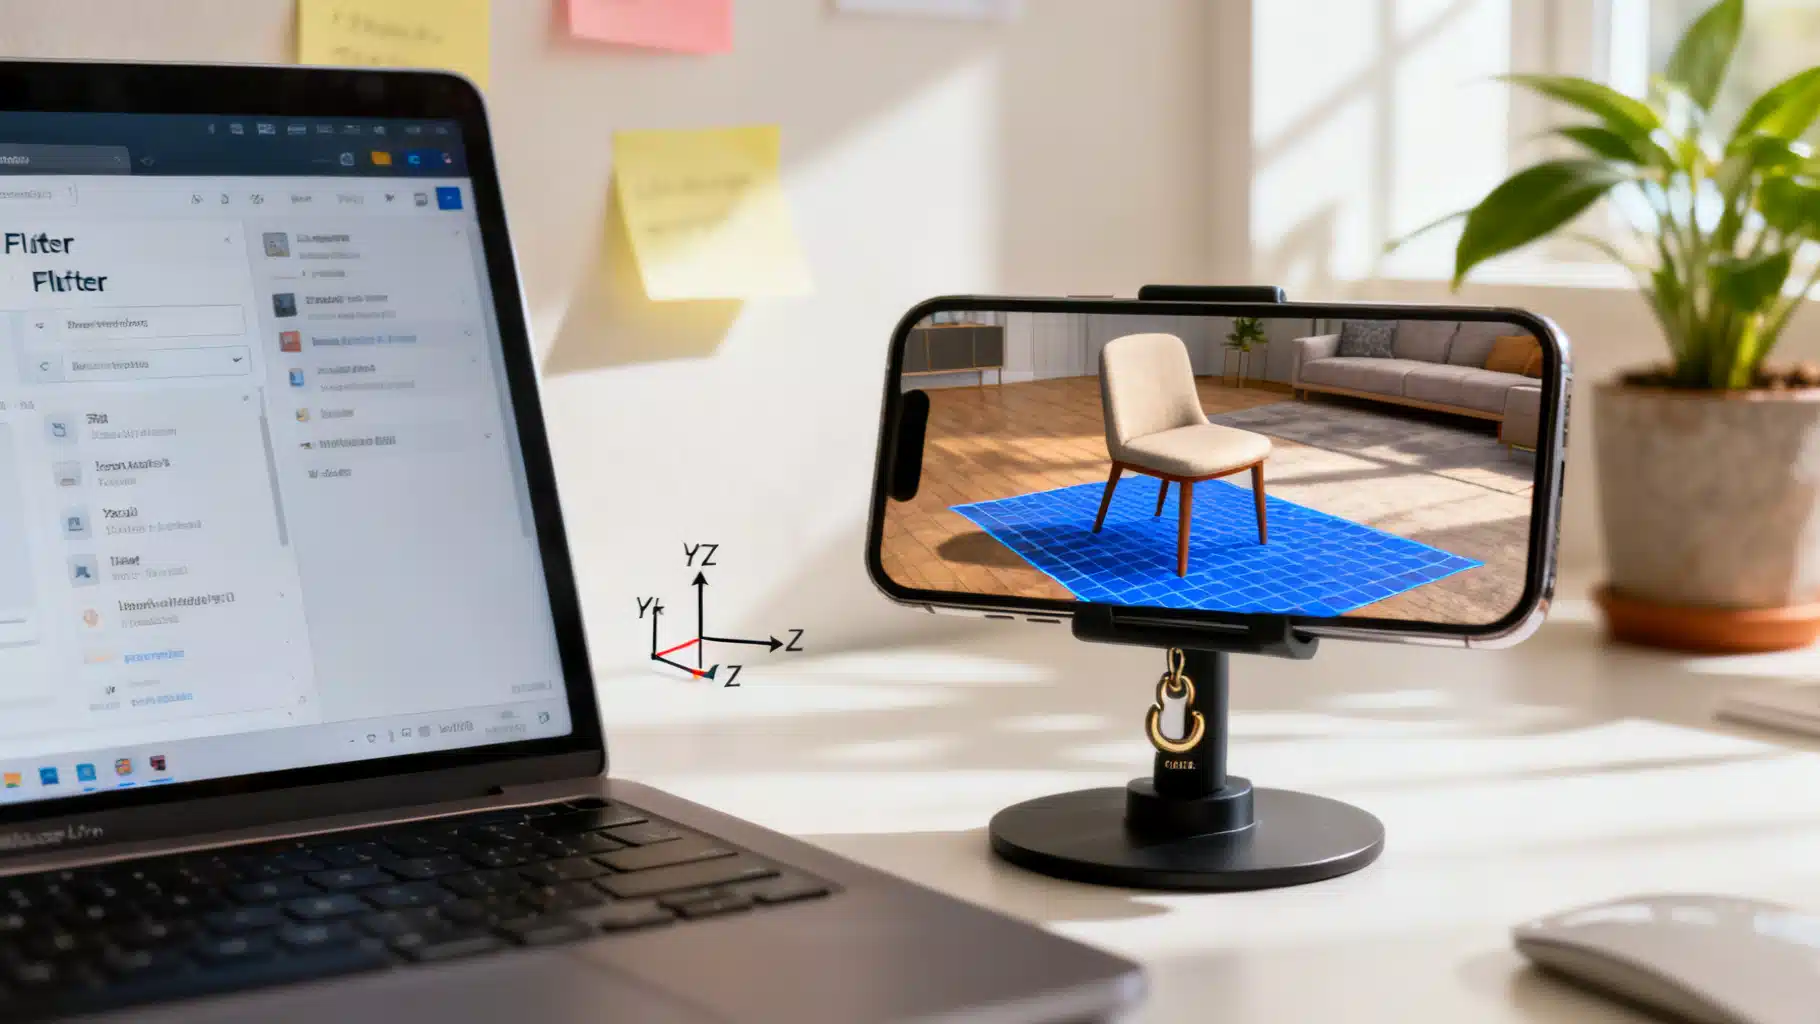
Image used for representation purposes only.
Why Flutter is Ready for Augmented Reality
Flutter’s rendering speed, unified UI layer, and hot reload make it a productive way to prototype and ship AR features to both iOS and Android. While AR rendering itself is native (via ARKit on iOS and ARCore on Android), Flutter plugins expose those native capabilities to Dart, letting you build cross‑platform AR without maintaining two separate codebases.
This article walks through the Flutter AR plugin landscape, end‑to‑end setup, a minimal working example, and the practices that keep frame rates high and experiences stable in production.
The Plugin Landscape at a Glance
There isn’t a single “official” AR plugin for Flutter. Instead, you’ll typically choose among these approaches:
- ar_flutter_plugin (cross‑platform)
- Wraps ARKit (iOS) and ARCore (Android) under a unified Dart API.
- Good for plane detection, anchors, placing 3D content, basic gestures, and some location features.
- arcore_flutter_plugin (Android only)
- Access to ARCore features directly on Android.
- arkit_plugin (iOS only)
- Access to ARKit features directly on iOS.
- Unity via flutter_unity_widget
- If you need AR Foundation, advanced shaders, complex physics, or an existing Unity project, embedding Unity can be practical—at the cost of app size and build complexity.
Choosing strategy:
- Want one code path for iOS and Android with native AR? Start with ar_flutter_plugin.
- Need platform‑specific features beyond the cross‑platform surface? Use arkit_plugin or arcore_flutter_plugin on the corresponding platform and write conditional code.
- Need advanced graphics, SLAM extensions, or a game‑engine workflow? Consider Unity embedding.
How Mobile AR Works (Crash Course)
- World tracking: The device estimates position/orientation in 3D space.
- Feature points and planes: The device detects surfaces (horizontal/vertical) where you can place virtual content.
- Anchors: Stable references tied to real‑world space. You attach virtual objects (nodes) to anchors.
- Lighting and occlusion: AR frameworks estimate lighting; some devices support people/environment occlusion.
Flutter plugins expose these building blocks so you can add 3D nodes, respond to taps, and maintain stable placements via anchors.
Prerequisites and Platform Requirements
- Hardware: A physical AR‑capable device. iOS Simulator and most Android emulators do not support AR.
- iOS: ARKit requires A9 or newer devices. Target iOS 13+ for modern APIs.
- Android: ARCore requires compatible devices (widely available). Target minSdkVersion ≥ 24.
Project Setup
- Add a plugin dependency (example with ar_flutter_plugin):
# pubspec.yaml
dependencies:
  flutter:
    sdk: flutter
  ar_flutter_plugin: ^x.y.z  # use the latest published version
- iOS configuration:
- In ios/Podfile:
platform :ios, '13.0' - In ios/Runner/Info.plist add:
<key>NSCameraUsageDescription</key>
<string>This app uses the camera for augmented reality.</string>
<key>UIRequiredDeviceCapabilities</key>
<array>
  <string>arkit</string>
</array>
- Android configuration:
- In
android/app/build.gradle:
android {
  defaultConfig {
    minSdkVersion 24
  }
}
- In
android/app/src/main/AndroidManifest.xml:
<uses-permission android:name="android.permission.CAMERA" />
<!-- Required to install only on AR-capable devices; set required=false if AR is optional -->
<uses-feature android:name="android.hardware.camera.ar" android:required="true"/>
A Minimal Cross‑Platform AR View (ar_flutter_plugin)
The snippet below renders an AR camera view, detects planes, and lets users tap to place a GLB model anchored to the detected surface.
import 'package:flutter/material.dart';
import 'package:ar_flutter_plugin/ar_flutter_plugin.dart';
import 'package:vector_math/vector_math_64.dart' as vm;

class SimpleARPage extends StatefulWidget {
  const SimpleARPage({Key? key}) : super(key: key);
  @override
  State<SimpleARPage> createState() => _SimpleARPageState();
}

class _SimpleARPageState extends State<SimpleARPage> {
  ARSessionManager? _sessionManager;
  ARObjectManager? _objectManager;
  ARAnchorManager? _anchorManager;

  @override
  Widget build(BuildContext context) {
    return Scaffold(
      appBar: AppBar(title: const Text('Flutter AR Demo')),
      body: ARView(
        onARViewCreated: _onARViewCreated,
        planeDetectionConfig: PlaneDetectionConfig.horizontalAndVertical,
      ),
    );
  }

  Future<void> _onARViewCreated(
    ARSessionManager sessionManager,
    ARObjectManager objectManager,
    ARAnchorManager anchorManager,
    ARLocationManager? locationManager, // some versions include this
  ) async {
    _sessionManager = sessionManager;
    _objectManager = objectManager;
    _anchorManager = anchorManager;

    await _sessionManager?.onInitialize(
      showFeaturePoints: false,
      showPlanes: true,
      customPlaneTexturePath: null,
      showWorldOrigin: false,
      handleTaps: true, // route taps to onPlaneOrPointTap
    );

    await _objectManager?.onInitialize();

    _sessionManager?.onPlaneOrPointTap = (hits) async {
      if (hits.isEmpty) return;
      final hit = hits.first; // choose closest hit

      // Create an anchor where the user tapped
      final anchor = ARPlaneAnchor(transformation: hit.worldTransform);
      final didAddAnchor = await _anchorManager?.addAnchor(anchor) ?? false;
      if (!didAddAnchor) return;

      // Add a 3D node (GLB from the web or assets)
      final node = ARNode(
        type: NodeType.webGLB, // or NodeType.localGLB for bundled asset
        uri: 'https://models.babylonjs.com/CesiumMan/glTF/CesiumMan.glb',
        scale: vm.Vector3(0.2, 0.2, 0.2),
        position: vm.Vector3.zero(),
        rotation: vm.Vector4(0, 0, 0, 0),
      );

      await _objectManager?.addNode(node, planeAnchor: anchor);
    };
  }

  @override
  void dispose() {
    _sessionManager?.dispose();
    super.dispose();
  }
}
Notes:
- Replace the URI with your own model. For local assets, declare them in pubspec and switch to
NodeType.localGLB. - Plane visualization can be toggled with
showPlanesor by assigning a custom texture.
Loading Models from Assets and the Network
- Assets (bundled):
- Add to pubspec:
assets: - assets/models/chair.glb - Use
NodeType.localGLBanduri: 'assets/models/chair.glb'.
- Add to pubspec:
- Network: Keep file sizes small; prefer GLB (binary glTF), Draco compression, and texture atlases. Cache downloads to avoid stutter on repeat loads.
Gestures and Interaction
- Tap to place is the simplest UX. For richer interaction:
- Scale/rotate nodes by updating their transform (e.g.,
objectManager.updateNode). - Highlight selected nodes by swapping materials or adding a subtle outline model.
- Use on‑screen UI sliders for precise rotation and scale to avoid jitter from raw gesture deltas.
- Scale/rotate nodes by updating their transform (e.g.,
Example: updating scale smoothly
Future<void> scaleNode(ARNode node, double factor) async {
  final s = node.scale * factor;
  await _objectManager?.updateNode(node, scale: s);
}
Image, Face, and Location Anchors
Depending on the plugin/platform, you can enable more anchoring modes:
- Image tracking (marker‑based): Recognize a known reference image and anchor content to it. Useful for packaging, posters, and manuals.
- Face tracking: Attach content to facial landmarks (iOS ARKit provides mature support; availability can vary on Android).
- Location/geospatial anchors: Place content at latitude/longitude with device heading. Great for outdoor AR cues, though accuracy depends on GPS, IMU, and mapping data.
When targeting both platforms, test each feature on real devices because support and fidelity can differ.
Rendering Quality: Lighting, Materials, and Occlusion
- Lighting: Prefer physically based materials. Some plugins can enable environment lighting estimation so objects pick up scene brightness and color.
- Shadows: A subtle plane‑shadow under objects grounds them. Use baked AO in textures if dynamic shadows aren’t available.
- Occlusion: On supported devices, person/environment occlusion helps virtual items appear behind real objects. If unavailable, design scenes to minimize obvious interpenetration.
Performance Tuning Checklist
Maintaining 60fps (or device refresh rate) is key:
- Models: target <50k triangles per object for mobile; merge meshes; remove hidden faces; atlas and compress textures (WebP/ASTC/ETC2 where applicable).
- GLB over GLTF+bin: fewer round‑trips and simpler loading.
- Level of Detail (LOD): provide multiple versions for far/near distances.
- Pool objects: reuse nodes when possible; avoid rapid add/remove cycles.
- Async everything: download, parse, and prepare models off the UI thread; show lightweight placeholders.
- Debounce taps and gestures; coalesce frequent transform updates.
- Minimize overdraw: keep overlays and semi‑transparent widgets modest on top of the camera feed.
Testing, QA, and CI
- Device matrix: Test on at least one iOS and two Android devices (mid‑range and high‑end). Battery levels, thermal throttling, and lighting conditions affect AR stability.
- Golden tests: Use standard Flutter widget and unit tests for non‑AR UI/logic. For AR code, isolate math/utilities for deterministic tests.
- Crash analytics: Capture plugin and OS versions, device model, and a trace around session start/stop.
Publishing and Store Readiness
- iOS:
- Ensure
NSCameraUsageDescriptionis present. - Add
arkittoUIRequiredDeviceCapabilitiesif your app requires AR to function, so non‑capable devices cannot install.
- Ensure
- Android:
<uses-feature android:name="android.hardware.camera.ar" android:required="true"/>if AR is mandatory; setfalseif AR is optional.- Verify the Play Console pre‑launch report on a few AR‑capable devices.
If AR is an optional feature, gate it behind a capability check and offer a fallback UI so the app remains installable on more devices.
Troubleshooting Common Issues
- Black camera feed or crash on start:
- Confirm camera permission and real hardware. Emulators typically won’t work.
- Check iOS minimum version and Android minSdkVersion.
- Objects drift or “swim”:
- Ensure anchors are used (not just free‑floating transforms).
- Ask users to move the device slowly at start so tracking converges.
- Plane not detected:
- Improve lighting and textured surfaces; glossy or featureless floors are hard to track.
- Huge model lags app:
- Use smaller GLB with compressed textures and simplify materials.
When to Consider Unity Instead
- Complex shaders, VFX, or physics.
- Multi‑scene AR games with animations and timelines.
- Need to share assets/workflows with a Unity team.
Unity adds build size and complexity, but AR Foundation provides a powerful, well‑maintained abstraction across ARKit and ARCore.
Putting It All Together
Start with a cross‑platform plugin to validate UX and feasibility. Keep models light, use anchors religiously, and profile early. As features grow, decide if platform‑specific plugins or a Unity embed is warranted. With disciplined asset pipelines and careful session management, Flutter can deliver smooth, production‑grade AR while preserving a single, elegant codebase for your UI.
Related Posts

Flutter Audio Player + Recorder Tutorial: Build a Polished Voice Notes Feature
Build a Flutter audio player + recorder: record voice, play with seek, handle permissions, show levels, and share files using just_audio and record.

Mastering Flutter Platform Channels on iOS and Android: A Practical Guide
A practical, end-to-end guide to Flutter platform channels on iOS and Android with Kotlin, Swift, Dart code, testing, performance, and pitfalls.
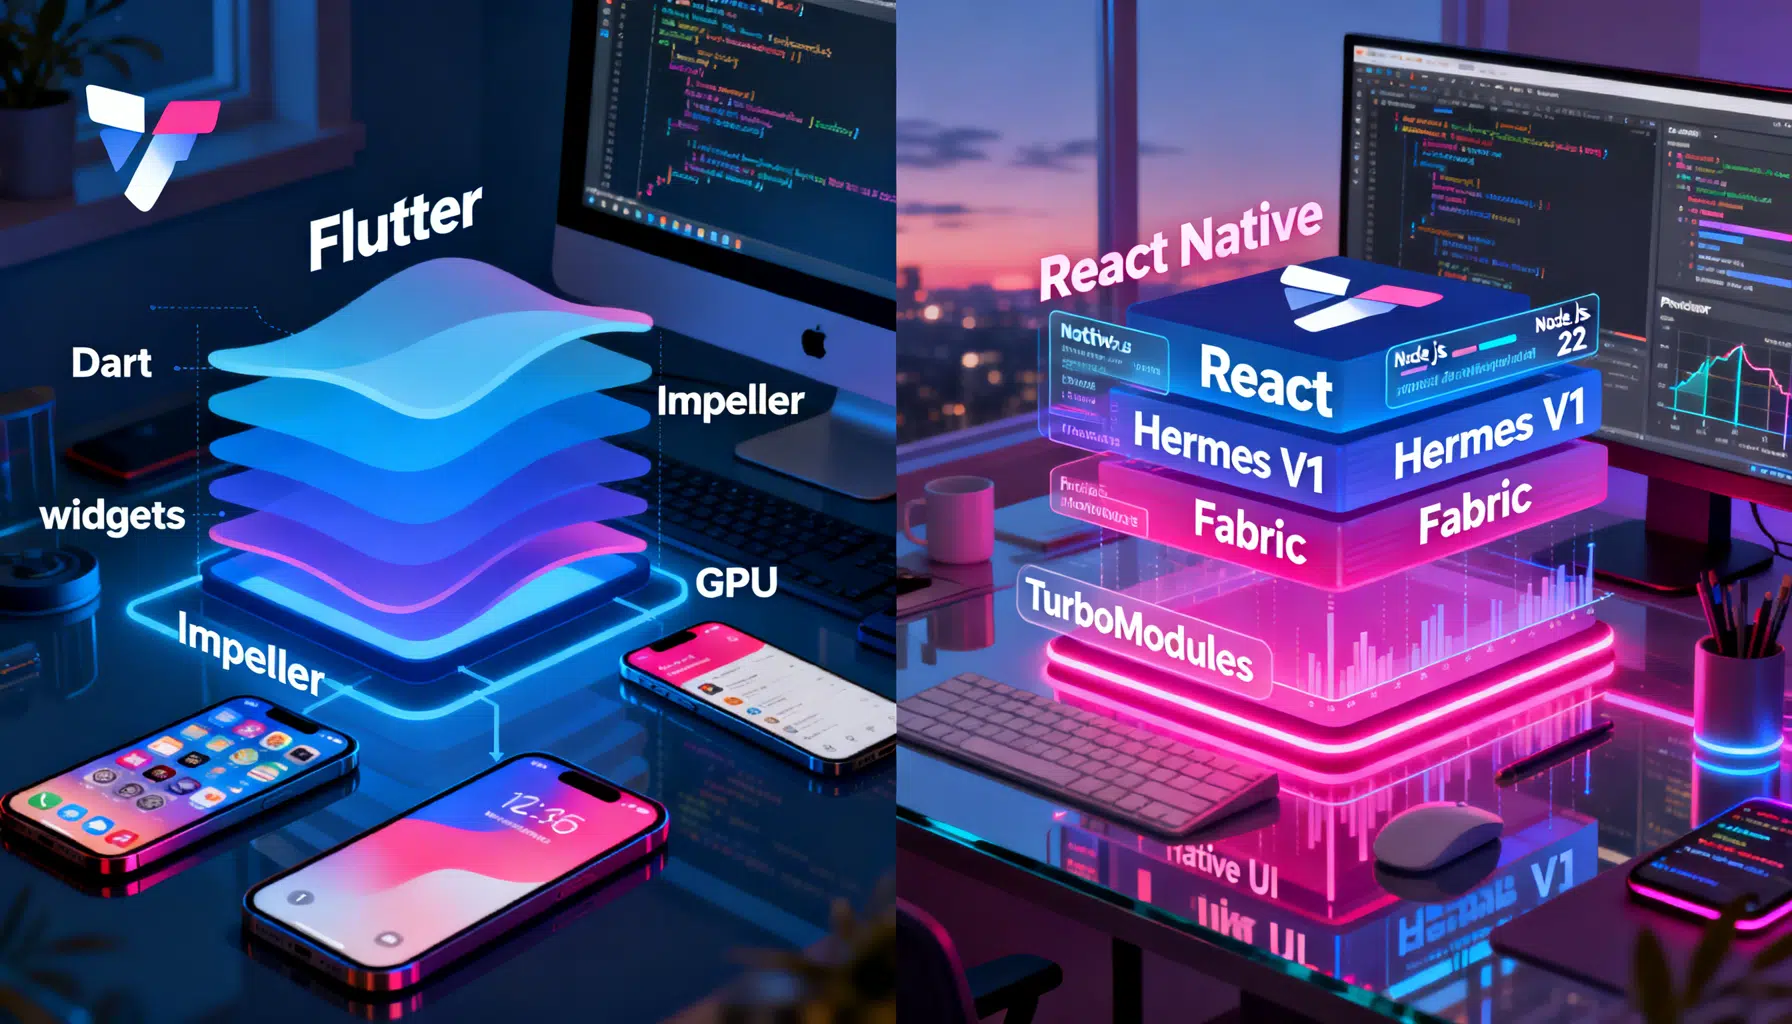
Flutter vs React Native in 2026: The Pragmatic Buyer’s Guide
Flutter vs React Native in 2026: architecture, performance, tooling, and when to choose each—concise, current, and practical.